1. Introduction
Last Updated: 2019-04-30
What makes a web app, a Progressive Web App?
Progressive Web Apps provide an installable, app-like experience on desktop and mobile that are built and delivered directly via the web. They’re web apps that are fast and reliable. And most importantly, they’re web apps that work in any browser. If you're building a web app today, you're already on the path towards building a Progressive Web App.
This is an multi-level unordered list
- Level 1
- Level 2
- Level 2
- Level 3
- Level 1
- Level 2
- Level 1
- Level 2
- Level 2
Fast & Reliable
Every web experience must be fast, and this is especially true for Progressive Web Apps. Fast refers to the time it takes to get meaningful content on screen, and provide an interactive experience in less than 5 seconds.
And, it must be reliably fast. It’s hard to stress enough how much better reliable performance is. Think of it this way: the first load of a native app is frustrating. It’s gated by an app store and a huge download, but once you get to a point where the app is installed, that up-front cost is amortized across all app starts, and none of those starts have a variable delay. Each application start is as fast as the last, no variance. A Progressive Web App must deliver this reliable performance that users have come to expect from any installed experience.
Installable
Progressive Web Apps can run in a browser tab, but are also installable. Bookmarking a site just adds a shortcut, but an installed Progressive Web App looks and behaves like all of the other installed apps. It launches from the same place as other apps launch. You can control the launch experience, including a customized splash screen, icons and more. It runs as an app, in an app window without an address bar or other browser UI. And like all other installed apps, it’s a top level app in the task switcher.
Remember, it’s critical that an installable PWA is fast and reliable. Users who install a PWA expect that their apps work, no matter what kind of network connection they’re on. It’s a baseline expectation that must be met by every installed app.
Mobile & Desktop
Using responsive design techniques, Progressive Web Apps work on both mobile and desktop, using a single code base between platforms. If you’re considering writing a native app, take a look at the benefits that a PWA offers.
What you’ll build
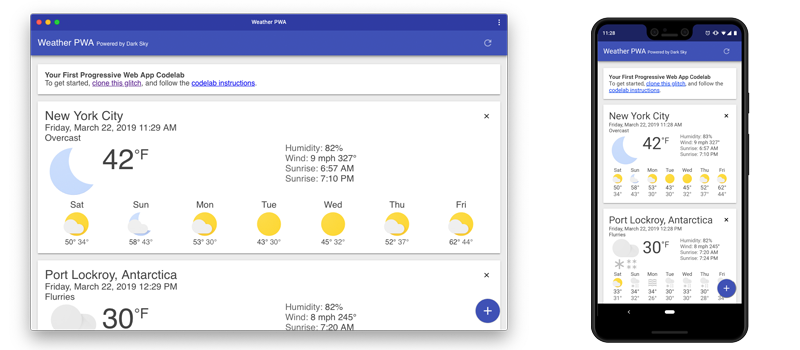
In this codelab, you're going to build a weather web app using Progressive Web App techniques. Your app will:
- Use responsive design, so it works on desktop or mobile.
- Be fast, using a service worker to precache the app resources (HTML, CSS, JavaScript, images) needed to run, and cache the weather data at runtime to improve performance.
- Be installable, using a web app manifest and the beforeinstallprompt event to notify the user it’s installable.
What you’ll learn
- How to create and add a web app manifest
- How to provide a simple offline experience
- How to provide a full offline experience
- How to make your app installable
This codelab is focused on Progressive Web Apps. Non-relevant concepts and code blocks are glossed over and are provided for you to simply copy and paste.
What you’ll need
- A recent version of Chrome (74 or later) PWAs are just web apps, and work in all browsers, but we’ll be using a few features of the Chrome DevTools to better understand what’s happening at the browser level, and use it to test the install experience.
- Knowledge of HTML, CSS, JavaScript, and Chrome DevTools.